
I like to use Adobe Photoshop for all of my photography needs. It has an amazing number of tools. However, it is incredibly complicated. Unless you have some time to sit down with it and really learn all of the ways it can help you, Photoshop can be a real pain.
But, and this is a hippo sized but, Photoshop is amazing. Photoshop will be your best friend in getting the photos you always wanted. If you don't have it, buy it. It's worth it.
Lucky for me, I learned Photoshop in college. So here are just a few of the things that you can do with Photoshop.
Color:
I took this picture of Caterpillar and just loved the angle. The Cheshire Cat is always saying that people frown on putting kids in cages and that's what this picture looks like.

So, it's cute and all, but it's nothing special.
I love the color of Caterpillar's dress, so I decided to take the color out of the rest of the picture and leave only the dress.
So in Photoshop I went to Image>Adjustments>Hue/Saturation.
Then I selected each color individually and desaturated. I left only the Maroon. And I am left with this:

Now the picture really stands out.
Okay, so you've got color down, now how about contrast and brightness.
I liked this photo of the Cheshire Cat a lot as is. I just decided to use it as an example of what you can do with brightness, contrast and color.

So I decided to mess around with the contrast to give the photo a soft finish.
In photo shop I upped the brightness and reduced the contrast by going to Image>Adjustments>Brightness/Contrast and voila:

She looks kinda angelic! (That's 'cause you don't know her).
Number three on our favorite tool list is the background blur. I like to use it when there is too much going on in the background and I want to focus in on something in the foreground. This takes a little more time but is totally worth it. I took this photo of Caterpillar and Gidget:

I wanted the two of them to pop out and for the Mad Hatter to fade into the background. Now, I can't describe every step I took, but I will try. First I selected the lasso tool in Photoshop and traced around Caterpillar and Gidget. Then I went to Select>Feather and set it at 50. Then I went to Select>Inverse so that the entire background was selected. Then I went to Filter>Blur>Gaussian Blur and found a good blur setting for this picture (45 for this one). And voila!

The background blurs out and the foreground pops. I love it!
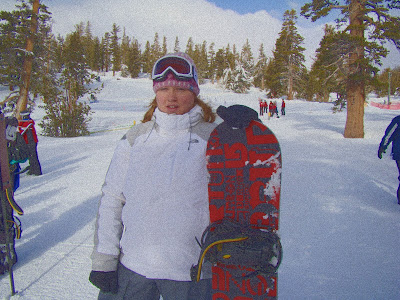
Finally, here is a tool that I don't use as much, but it is fun. It's not really for day to day pictures but more of a fun way to mess with them. In Photoshop there is something called the Filter Gallery. There are a million ways to mess with a photo here. So I took this picture of myself...

and gave it poster edges

or perhaps you prefer the graphic pen look

or maybe it should look like an old grainy film.
These are just a few of the MANY ways you can play with your pictures. I'm not sure I did a great job of explaining the process, but I am a kinesthetic learner - I learn by doing not talking about it - and messing around with it is the best way to learn.
Happy Photoshopping!


 meghaninwonderland@gmail.com

0 comments to blog for:
Post a Comment